[Note: This article is with respect to Powershell 5.0.10240.16384]
Let us look into the powershell command ‘Get-ChildItem’. This command is used to list the items under a parent item.
Get-ChildItem
The basic form of this command is ‘Get-ChildItem’ without any options. Then it will list the “directories” and “files” in the current directory.
For example if run from the location “C:\Program Files”, it will list the directories and files in “C:\Program Files”
Get-ChildItem –Path <path as string>
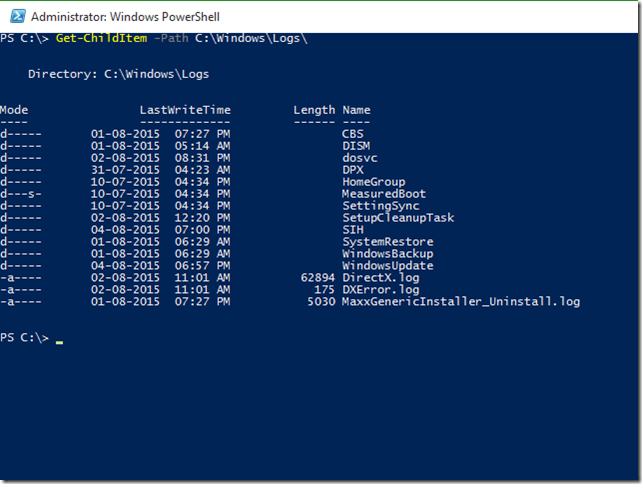
This form of the command accepts a “path of the parent” whose child items it will display. For example see the below screen which depicts the working of this command. Here the value of “Path” attribute is “C:\Windows\Log”.
You can put the value of “Path” attribute in single quotes as shown below. This is used if the path value is having space in it.
Also you can avoid specifying “-Path” completely. See the example below
If there is no sub-items in the parent directory there will be no result. Please see the example below. Here the directory doesn’t have any content
Get-ChildItem –Path <path as string> –Directory
This form of the command will only retrieve the directories in the given path.
Get-ChildItem –Path <path as string> –File
This form of the command will only retrieve the files in the given path. You can’t use the switch attributes “-Directory” and “-Files” simultaneously
{They are called switch attributes because they act like switches. Specifying them will alter the switch the behaviour. They don’t take any values}
Get-ChildItem -Path <path as string> –Recurse
This form of the command will retrieve the files and subdirectories in the directory recursively. That is powershell will travel through all the subdirectories recursively and print the output.
Get-ChildItem -Path <path as string> –Recurse –Depth <integer greater than or equal to zero>
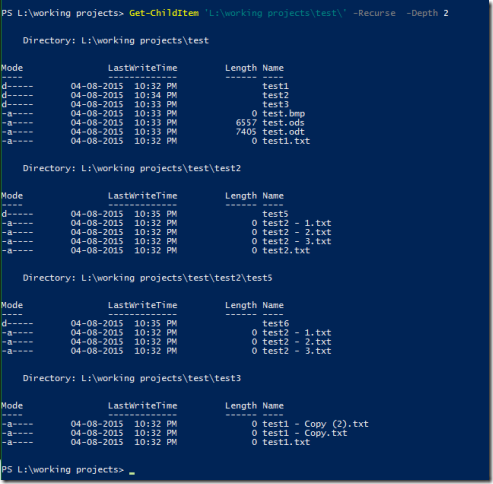
This form of the command will retrieve the files and subdirectories in the directory recursively up to the value specified in depth. The items which resides up to the depth will be printed.
If the value of “–Depth” is zero it is same as the command ‘Get-ChildItem -Path <path as string> ‘.
See the below image. The directory “test6” is not visible in the output, since we set the depth to 2.
Get-ChildItem -Path <path as string> –Name
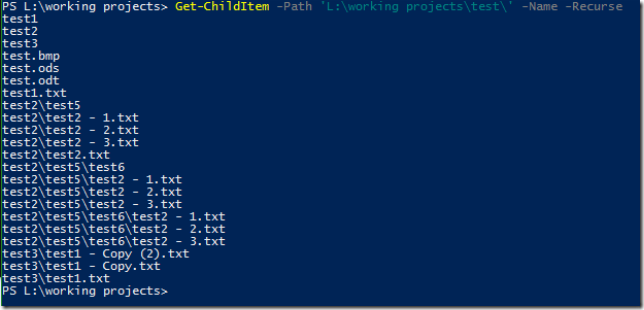
This form of the command will retrieve the files and subdirectories in the directory, but list only there name in the output.
Get-ChildItem -Path <path as string> –Exclude <Pattern as string>
This form of the command will retrieve only files and subdirectories that doesn’t match the pattern specified as the value of “–Exclude” option. Compare the below image with the above one. In the below image I have excluded items using the pattern “test2*”.
Get-ChildItem -Path <path as string> –Include<Pattern as string>
This form of the command will retrieve only files and subdirectories that match the pattern specified as the value of “–Include” option. Compare the below image with the one for “Get-ChildItem -Path <path as string> –Name”. In the below image I have included only items that match the pattern “test2*”.
Get-ChildItem –Path <path as string> –Hidden
This form of the command will only retrieve the hidden items in the given path.
There is also one more method to get the hidden files. Use the command form “Get-ChildItem –Path <path as string> –Force”
Get-ChildItem –Path <path as string> –ReadOnly
This form of the command will only retrieve the read-only items in the given path.
Get-ChildItem –Path <path as string> –System
This form of the command will only retrieve the system items in the given path.


