Showing posts with label Ubuntu Server. Show all posts

Thursday, 9 October 2014

mkdir command


This command is used to create a new directory. The various formats of the command are as follows

mkdir <directory_name> ......

This will create a new directory with the name “directory_name” in the current directory.

mkdir <path/directory_name> .....

This will create a new directory with the name “directory_name” in the specified path. The parent directories should exist for this to work properly. Otherwise it will throw error.

mkdir -m <MODE> [other options] <directory_name> ... | <path/directory_name> ...

OR

mkdir -m<MODE> [other options] <directory_name> ... | <path/directory_name> ...

This will create a new directory with the name “directory_name” in the current directory or specified path with the permission as specified by the “MODE” value. If other options (except –help and –version) are specified “mkdir” will take care of that also while creating directories.

mkdir -p [other options] <path/directory_name> ...

This will create a new directory with the name “directory_name” in the specified path with the creation of parent directories as needed. If the parent directory already exists, there is no problem. If it doesn't the command will create the directory. If other options (except –help and –version) are specified “mkdir” will take care of that also while creating directories.

mkdir -v [other options] <directory_name>... | <path/directory_name>...

A message is outputted for each of the created directories. If the directory already exists no message is shown.

mkdir –-help

Shows the help for the command

mkdir –-version

Shows the version of the command

Creating multiple directories at a stretch

mkdir <directory1> <directory2> <path/directory3> ....

This will create all the directories. You can use any options (except –help and --version) of the “mkdir” command along with this.

Examples

Creating a directory named “test” in the current directory.

mkdir test

Creating a directory named “test” in the directory “/tmp/testabc/”. The directories “/tmp” and “/tmp/testabc” already exists.

mkdir /tmp/testabc/test

Creating a directory named “test” in the current directory with permission 644

mkdir -m644 test

Creating a directory named “test” in the directory “/tmp/testabc/” with permission 555. The directories “/tmp” and “/tmp/testabc” already exists.

mkdir -m555 /tmp/testabc/test

Creating a directory named “test” in the path “/testabc/hai/monday/week/day”. None of the directories in the path exists, except “/”

mkdir -p /testabc/hai/monday/week/day/test

Creating a directory named “hello” in the path “/hai/month/week/day” with permission 700. None of the directories in the path exists, except “/”

mkdir -pm700 /hai/monday/week/day/hello

Wednesday, 19 February 2014

Changing Hostname in Ubuntu


To change the hostname in ubuntu permanently you have to edit two files.

The first one is the file “hostname” located in the folder “/etc”. To edit this file using vi you can use the command “sudo vi /etc/hostname” in the terminal. To edit the file in gedit you can use the command “sudo gedit /etc/hostname”. No change the name given in this file and save the same.

After that you need to change one more file. Open the file “hosts” in the location “/etc’'. Edit this file and change the line containing the old hostname to new one. After that save the file. For editing you can either use the “vi” or “gedit” as mentioned in the previous paragraph. Just change the file path and name in that command.

Now restart ubuntu. It will be having the new name now.

Thursday, 13 February 2014

Ubuntu Server Setting IP Address by Editing “Interfaces” File


First login to Ubuntu server. Ubuntu server stores the configuration of network interfaces in the file “/etc/networks/interfaces”. To view the content of the file use the command “cat /etc/networks/interfaces”. So let see and example file in the below picture.

Here as can be seen there are two interfaces. The one with the name “lo” is the loopback interface. The other with the name “eth0” is the real interface connected to this machine. Here it is set to “DHCP” as shown by the line “iface eth0 inet dhcp”.
Now let us check the IP obtained by the machine. For this we have to use the command “ifconfig”. The ip as shown by the command is depicted in the picture below.

Now let us edit the file “/etc/networks/interfaces” to set the IP address to static. We will set the IP address to “192.168.56.105”. Here we assume the network interface is taken as “eth0”. For this you have to add the following lines as shown in the picture below:
[Use the command “sudo vi /etc/networks/interfaces” to edit the file]
auto eth0
iface eth0 inet static
address 192.168.56.105
netmask 255.255.255.0
gateway 192.168.56.1

After this save the file. (Hope you are familiar with vi editor).  Now to have the settings take effect you need to restart the service named “networking”. For this use the command “sudo service networking restart”. After that let us check the ip again using the “ifconfig” command”". See the picture below:

Now the IP has changed. Now let us ping to “google.com” and see the result. [I have Internet access from this system. Otherwise this ping won’t work. You can ping to your domain computers if yours is internal network]

My God no ping. I had set the network interface with IP, so what is the problem. Oh! I forget to set dns entries. OK let us add the same to the file “/etc/networks/interfaces”. For this you have to add the line “dns-nameservers <ip1> <ip2>”. Normally two ips for dns that is why. You can any number of ips separated by spaces.

Now restart the “networking” service again. Let us check the content of “/etc/resolv.conf” file by using the command “cat /etc/resolv.conf”.

You can see the dns server entries are now in this file. Don’t edit this file directly as it is generated dynamically on every reboot.
Now let us again ping to ”google.com”.

Got the ping. Now everything is working fine.

Monday, 9 December 2013

Finding Ubuntu and Kernel Version and other details


Finding kernel details
You can use the “uname” command to find the kernel details in Ubuntu. The command has got various options which is described below
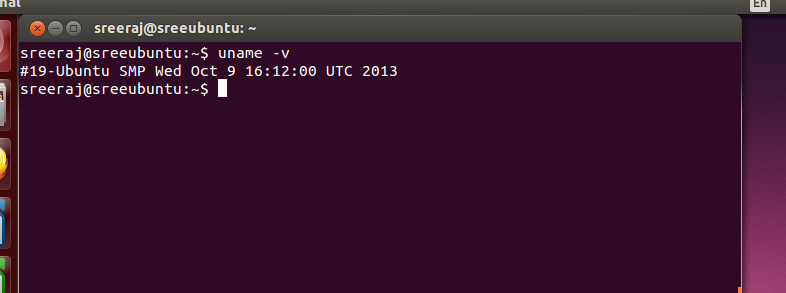
uname –v
This will show the kernel-version. When executed in Ubuntu 13.10 the result is as follows

uname –r
This command helps one to find the kernel release version. Please see the result of the same in Ubuntu 13.10 below

uname –s
This command helps one to list the kernel name.

uname –n
This command helps one to list the node name i.e the machine name or name you have given to your system.

uname –m, uname –p and uname –i
These variants help one to find the machine hardware name, the processor type and the hardware platform type.

Now if you want to see all these information at once you can use the following variant of the command
uname –a


Finding Ubuntu version details
Using the command “lsb_release” one can find some information about the Ubuntu version. Let us go through different variants of the command
lsb_release –r
This variant will help you to get the Ubuntu release version

lsb_release –i
This command will show the distribution ID of the Ubuntu release

lsb_release –d
Helps to get the description attached with the distribution

lsb_release –c
This command helps to find the codename assigned to the release

Now if you want to see all these information at once you can use the following variant of the command
lsb_release –a


Thank you all………….

Monday, 2 December 2013

Installing Ubuntu Server 13.10 in Virtualbox


As usual let us create a VM in virtual box as shown below


Click on the “New” button after invoking Virtualbox as shown above.

The the name of your VM. If your name contains the word “Ubuntu” anywhere, virtualbox will automatically select the version as “Ubuntu”. Otherwise do the same. Select type as “Linux” and version as “Ubuntu (64-bit)”.

Select the memory size. the minimum is “512 MB”.

Now select the option “Create a virtual hard drive now” and click on “Create”.

In the next page, select “VDI” as the type of hard drive file and click on “Next”.

No specify what type the hard drive to be. Select the desired one and click “Next”. Here, we have selected “Dynamically allocated”.


Select the location where the hard drive should be saved and also select the size of the hard drive. The minimum size is “8 GB”. Now click on “Create”. The different screen views are shown above.

In the above screenshot the initial size of the virtual hard drive file is shown if the type is “dynamically allocated”

Now let us change some setting of the VM. For this right click the VM and click on the menu item “Settings”.

In the “Setting” window select “Storage”. Click on the “CD icon” to the right of “CD/DVD Drive” box. Click “Choose a virtual CD/DVD disk file….”.

Browse to the server iso file and select it. Now click the “Open” button.

Now click the “OK” button in the “Settings” window. Now power on the VM by clicking the “Start” icon.

When the Ubuntu server boots from the CD, it first shows a language selection window. Select the desired language.

Now it will list out the options for you to select. Select the option “Install Ubuntu Server” and press Enter key.

Select the language for the ubuntu server that you are going to install and press Enter key.

Select the country and press Enter key

Now it will ask whether to detect the keyboard layout or not. Select the desired answer. Here we have selected “No”. Press Enter key to proceed

Select the country or origin of the keyboard layout from the list and press Enter key.

Select the keyboard layout from the list and press Enter key as shown above.


Ubuntu is preparing for the configuration of network.

Now it is trying to auto configure IPv6.

Since it is unable to autoconfigure IPv6, it is trying DHCP.

Showing the auto configure failure dialog box. Press Enter key to continue

Now it is showing different options for configuring network. Here we select “Configure network manually”. Select the desired option and press Enter key.

Enter the desired IP address. Select the “Continue” option (Press Tab key to select it) and press Enter key.

Enter the Netmask and press Enter key after selecting “Continue”.

Enter the gateway address and press Enter key after selecting “Continue”

Enter the desired DNS address and select “Continue” and press Enter key.

This shows the Ubuntu configuring network link with the entered values.

Enter the “Hostname” and press enter after selecting “Continue”.

No it will ask for the Full name of the use. Please enter the same and press enter after selecting “Continue”

Now enter the username and press enter after selecting “Continue”.

Now enter the password and press enter after selecting “Continue”.

In this screen as shown above re-enter the password for verification and press enter after selecting “Continue”.

Now Ubuntu will query to encrypt the home directory or not. Select the desired option and press enter to continue.

After this ubuntu will try to setup the clock correctly as shown above.

It will ask you to verify the time zone correctly. Select the desired option and press enter to continue.

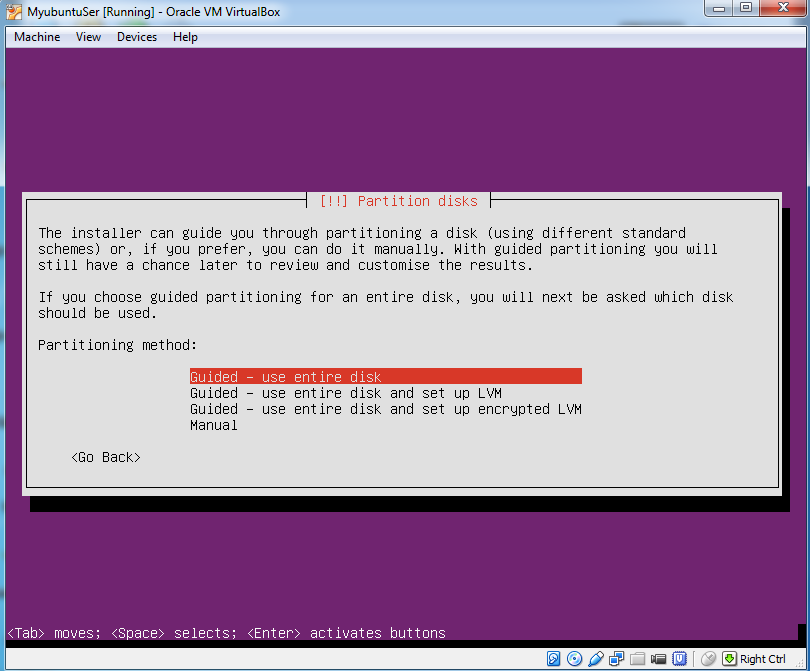
Now Ubuntu will ask you to partition the disk as you wish.

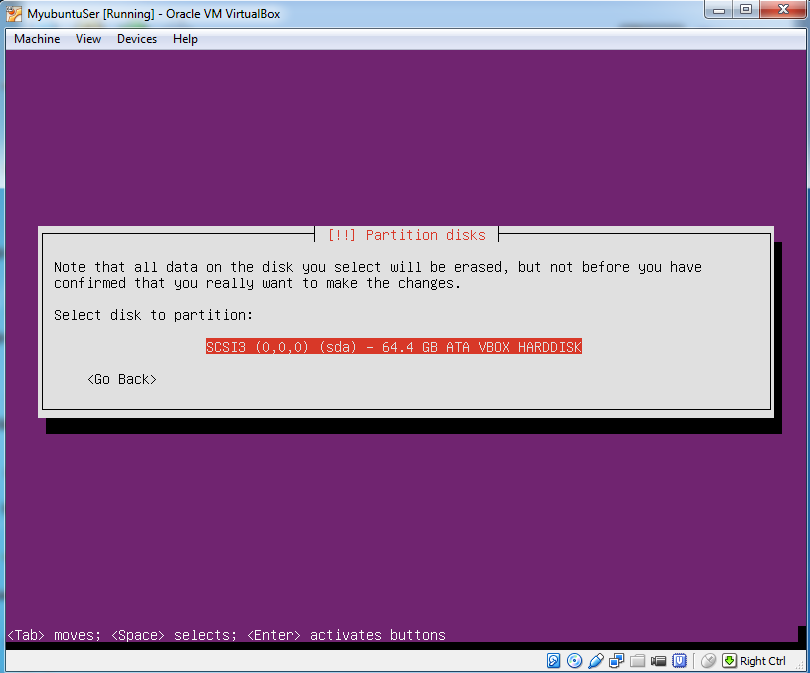
Since we have selected to use the entire disk, It will ask us to select the disk we want to use. Select the disk and press enter.

Ubuntu is showing how the partitions will be created. It is also asking for the permission to write the changed to the disk. Select “Yes” and press Enter key

It is installing the system

Ubuntu is asking for proxy details, if your system is behind any proxy. If none is there leave the field blank

It is now configuring apt

It is now asking how you want the updates to be managed

Now it queries how you want to setup your initial system. Here we have selected to setup it as “Samba file server”. If you don’t want to setup anything initially, select “Manual package selection”.

Asking permission to install GRUB.

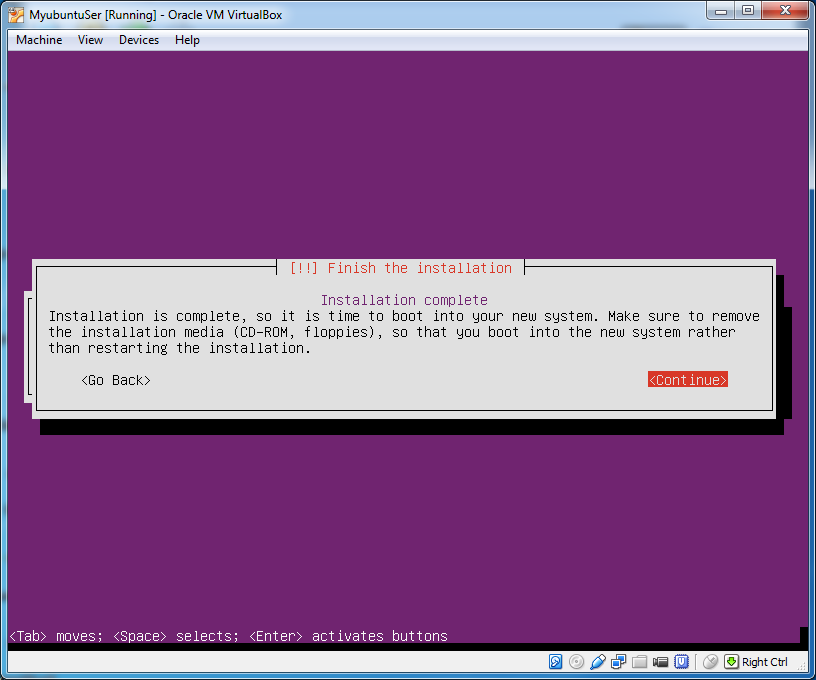
The Server Installation has completed.

The new Ubuntu server login screen.