Showing posts with label Virtualbox. Show all posts

Sunday, 17 April 2016

How to download Virtualbox GuestAddition iso


First go to the Url "https://www.virtualbox.org". Then click on the link "Downloads" in the side menu.
image
In the appeared page click on the link named "VirtualBox 5.0.16 for Linux hosts".
image
Scroll down the appeared page. You will see a Url as shown in the picture below. Copy the same and paste in address bar
image
Now you will see a page as shown below. Click on the desired version.
image
You will be able to see the "VboxGuestAdditions_x.x.xx.iso" file. Click on it and the download will start
image


Tuesday, 10 November 2015

Installing Fedora in Virtualbox VM


This post assumes people already know creating a VM in virtualbox.

After creating the VM for installing Fedora, mount the ISO file as a CD drive or put the CD for Fedora in the host OS and attach the CD drive to guest OS.

Boot the VM through its CD Drive (which is either the ISO file mounted or the attached CD drive of the host). You will see a screen as below. You can either wait to start the Fedora Live, or you can just press the enter key to proceed quickly.

1

As the below screen shows the Fedora Live CD will be started.

2

After completing the startup it will show you two options to proceed further, as shown in the below screen. Either you can install Fedora on an HD or you can just use the live CD to get a feel of fedora. Here we will choose the option “Install to Hard Drive”

3

As shown below, it will ask you for the UI Language. The first language selected will be “Hindi”. If you want to change it select the desired language. The first box from left shows the language and upon selecting the second one will show the variants of the language.

4


We have changed the language to English India. Please see the screen below. After that click on “Continue” button at the bottom.

5

This is the next screen (second screen) of the Installation Wizard.  Here you can modify “Keyboard”, “Time & Date”, “Installation Destination” and “Network & Hostname”

Just click on the desired item. It will take you to the configuration screen for the respective item. The items that are shown with and exclamation in triangle icon should be configured to proceed further.

6

Let us configure the disk partition. Clicking on the “Installation Destination” item in the above screen will take you  to partition configuration screen, as shown below. Since there ism only one disk it is selected by default. Also  the “Partitioning” is Automatic selected by default. Here we will proceed with the default values. After selecting the desired values click on “Done”

8

After clicking “Done” on the above screen you will be taken back to the screen as shown below. When it completes the saving of storage configuration the “Begin Installation” button will get enable. The system will start the partitioning only after you click the “Begin Installation” button.

9


As shown in the screen below, now “Begin Installation” button is active. Click on that button to start the installation process.

10


When you click the “Begin Installation” button as specified earlier the installation process will start. Now you have to set the root password and create one user which will belong to the “sudoers” group.

11


Clicking on the “Root Password” in the above screen will take you to the screen below. Set the password here and click on “Done” button. This will take you back to the above screen.

12

Clicking  on the “User Creation” button in the “Configuration” screen will take you to the screen below. Fill the fields and click on “Done” button.

15


After the above steps, please be patient as the fedora installation continues. When the installation completes Fedora will show a screen similar to one shown below.

17

Now you are ready for using Fedora. Good Luck!!!!!!!!!!!!!!

Thursday, 13 February 2014

Installing Kubuntu in Virtualbox

As I have mentioned in my other posts describing the Installation of Ubuntu in Virtualbox, first create a VM for installing Kubuntu. Then add the “iso” file the CD Drive for the system. Start the VM.
It will bring the first screen of Kubuntu as shown below

Select the option “Start Kubuntu” (which will be selected by default) and press Enter to continue. The below screen shows the loading of Kubuntu.

As shown below after loading Kubuntu, it will directly take you to the Welcome screen. There you have the option to wither try the live CD or Install Kubuntu. Click on “Install Kubuntu”.

The next screen will be the “Prepare” screen. Here Kubuntu will check whether the minimum disk space is available as well as whether Internet is available. Also you have the choice to select the installation of third-party software as well as downloading updates. Here we haven’t selected any of this option.

The next screen is “Disk Setup” where you will setup the partitions. Here if you select “Manual”, you will be shown screen for creating partitions manually. We have selected “Guided – use entire disk” option. So everything will be done automatically by Kubuntu. After doing that click on “Install Now”.

On clicking the “Install Now” button in the above screen, Kubuntu starts creating partitions which will be shown in the same screen as a progress bar at the bottom. This is shown in the picture below.

After creating partitions it will move to the next screen named “Timezone”. Here you can set the time zone. You can either select the same from combo box or by clicking the map. After that click on “Continue”. Kubuntu will be copying the files to the Hard disk in the background at the same time.

The next screen is the “Keyboard” screen. Select the appropriate keyboard here and click on “Continue”

Next is the “User Info” screen. Enter the name, username, password and computer name in this screen. Also set the options like whether you want to “log in automatically” or “require password to log in” as well as to “Encrypt the home folder or not”. After that click on “Continue”.

This will take you to the last screen. Now you will waiting for the installation to complete.

As you can see below the installation has completed and now it is asking for a restart. Click on the “Restart Now” button.

Vow, after restarting you will be taken to the nice, beautiful login screen of Kubuntu. Just enter the password and login.

Now Kubuntu is loading the necessary services. After that it will take you to the desktop.

The beautiful Kubuntu desktop. I love this desktop. So cute.

Monday, 2 December 2013

Installing Ubuntu Server 13.10 in Virtualbox


As usual let us create a VM in virtual box as shown below


Click on the “New” button after invoking Virtualbox as shown above.

The the name of your VM. If your name contains the word “Ubuntu” anywhere, virtualbox will automatically select the version as “Ubuntu”. Otherwise do the same. Select type as “Linux” and version as “Ubuntu (64-bit)”.

Select the memory size. the minimum is “512 MB”.

Now select the option “Create a virtual hard drive now” and click on “Create”.

In the next page, select “VDI” as the type of hard drive file and click on “Next”.

No specify what type the hard drive to be. Select the desired one and click “Next”. Here, we have selected “Dynamically allocated”.


Select the location where the hard drive should be saved and also select the size of the hard drive. The minimum size is “8 GB”. Now click on “Create”. The different screen views are shown above.

In the above screenshot the initial size of the virtual hard drive file is shown if the type is “dynamically allocated”

Now let us change some setting of the VM. For this right click the VM and click on the menu item “Settings”.

In the “Setting” window select “Storage”. Click on the “CD icon” to the right of “CD/DVD Drive” box. Click “Choose a virtual CD/DVD disk file….”.

Browse to the server iso file and select it. Now click the “Open” button.

Now click the “OK” button in the “Settings” window. Now power on the VM by clicking the “Start” icon.

When the Ubuntu server boots from the CD, it first shows a language selection window. Select the desired language.

Now it will list out the options for you to select. Select the option “Install Ubuntu Server” and press Enter key.

Select the language for the ubuntu server that you are going to install and press Enter key.

Select the country and press Enter key

Now it will ask whether to detect the keyboard layout or not. Select the desired answer. Here we have selected “No”. Press Enter key to proceed

Select the country or origin of the keyboard layout from the list and press Enter key.

Select the keyboard layout from the list and press Enter key as shown above.


Ubuntu is preparing for the configuration of network.

Now it is trying to auto configure IPv6.

Since it is unable to autoconfigure IPv6, it is trying DHCP.

Showing the auto configure failure dialog box. Press Enter key to continue

Now it is showing different options for configuring network. Here we select “Configure network manually”. Select the desired option and press Enter key.

Enter the desired IP address. Select the “Continue” option (Press Tab key to select it) and press Enter key.

Enter the Netmask and press Enter key after selecting “Continue”.

Enter the gateway address and press Enter key after selecting “Continue”

Enter the desired DNS address and select “Continue” and press Enter key.

This shows the Ubuntu configuring network link with the entered values.

Enter the “Hostname” and press enter after selecting “Continue”.

No it will ask for the Full name of the use. Please enter the same and press enter after selecting “Continue”

Now enter the username and press enter after selecting “Continue”.

Now enter the password and press enter after selecting “Continue”.

In this screen as shown above re-enter the password for verification and press enter after selecting “Continue”.

Now Ubuntu will query to encrypt the home directory or not. Select the desired option and press enter to continue.

After this ubuntu will try to setup the clock correctly as shown above.

It will ask you to verify the time zone correctly. Select the desired option and press enter to continue.

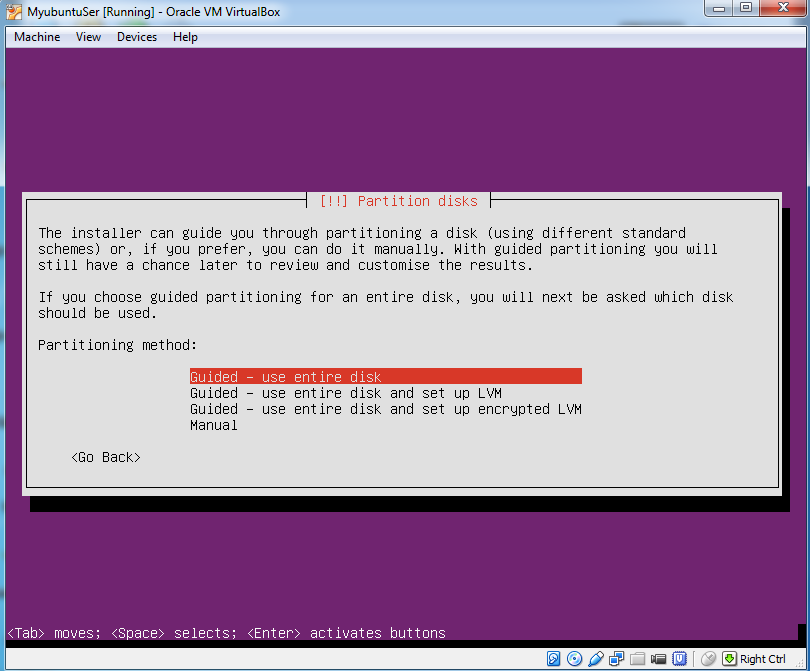
Now Ubuntu will ask you to partition the disk as you wish.

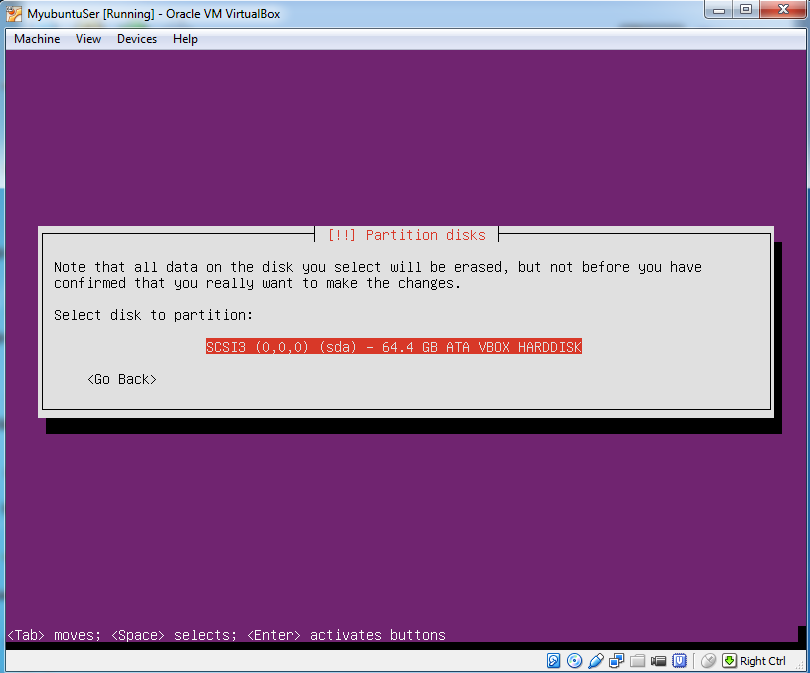
Since we have selected to use the entire disk, It will ask us to select the disk we want to use. Select the disk and press enter.

Ubuntu is showing how the partitions will be created. It is also asking for the permission to write the changed to the disk. Select “Yes” and press Enter key

It is installing the system

Ubuntu is asking for proxy details, if your system is behind any proxy. If none is there leave the field blank

It is now configuring apt

It is now asking how you want the updates to be managed

Now it queries how you want to setup your initial system. Here we have selected to setup it as “Samba file server”. If you don’t want to setup anything initially, select “Manual package selection”.

Asking permission to install GRUB.

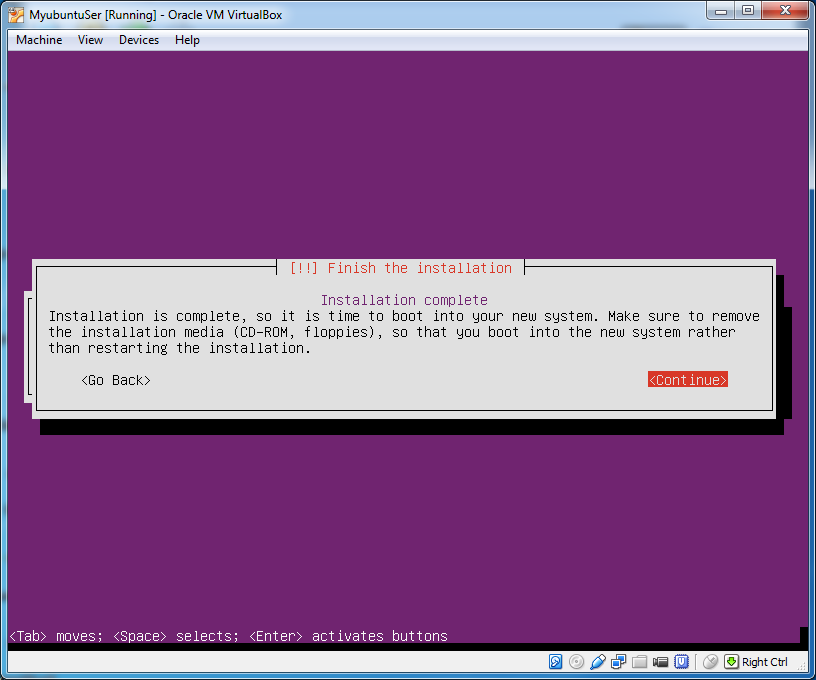
The Server Installation has completed.

The new Ubuntu server login screen.

Debian Deep Dive — Filesystem Hierarchy Standard

// System Administration · Debian Linux · Foundation The Linux Filesystem Hierarchy A thorough tour of the standard an...