Showing posts with label Vmware. Show all posts

Tuesday, 21 May 2013

Connecting to ESXi host from vSphere Client


Start the vSphere Client by double clicking the vSphere Client icon on the desktop. Enter the name / ip address of the ESXi host, the username (which is root) and the password for the user.


Now a security warning will be displayed, which can be ignored. Tick the checkbox and click Ignore button


Now if the Vmware has no license key, an evaluation notice will be displayed. Just click the “OK” button.


Click on the “Inventory” icon in the above screen. You will see the below screen, which is the ESXi host.

Installing vSphere Client in Windows Server 2012


From the vCenter Server CD go to the folder “vSphere-Client” and double click the “exe” file. The installation will start as shown below


The setup program will ask for the language. Click “OK” to start the installation wizard.


The installation programs is extracting the necessary files to start the installation wizard.


The first screen of the installation wizard. Click “Next” to go to the next screen of the installation wizard.


Click “Next” to proceed to the other screen.


Accept the license agreement and click “Next” to proceed further.


Specify the location for the client installation and click “Next”.


Click “Install” to start the installation process of vSphere Client.


Installation process started. Installing J# for vSphere Client.


Installation process continuing. Copying files.


Installation of vSphere Client completed.


vCenter Server Installation on Windows Server 2012


This procedure describes the installation of vCenter Server on Windows Server 2012. Insert the CD for vCenter server into the CD/DVD Drive. The “autorun” feature will bring the following screen to your computer desktop. In the below screen we have selected “VMware vCenter Simple Install”, because this helps us to install vCenter Single Sign On, vCenter Inventory Service and vCenter Server in a single click. Please note the prerequisites are met before starting the installation. We have to install .NET 3.5 SP1 manually, if it is not installed already by us manually.
As shown below select “VMware vCenter Simple Install” and click on “Install” button.


The installation of vCenter Single Sign On will start first. Since it is a prerequisite for vCenter Server installation. The screenshot is shown below


The first screen of installation wizard is shown below. Wait for the “Next” button to get enabled.


A warning showing that the machine is not a member of domain. Just click “OK”.


Now the wizard starts extracting files required for installation as shown below.


As shown below, now the “Next” button is enabled. Click on it to go to the next screen.


Click  the “Next” button again for the screen shown below


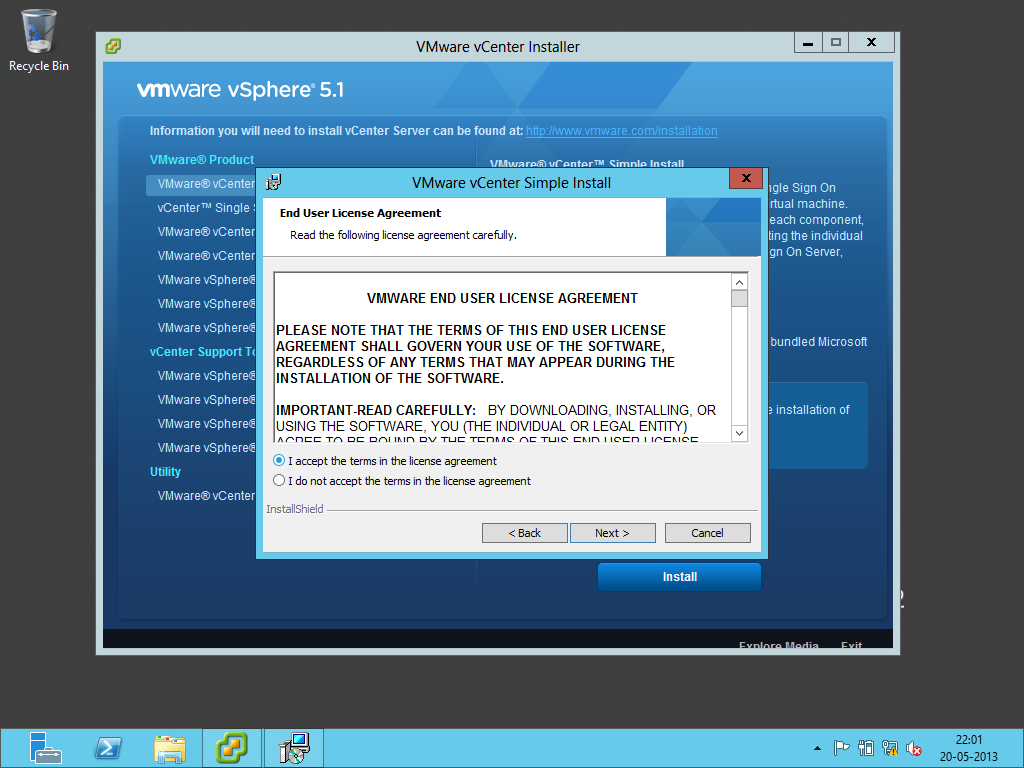
Select the “I accept…” option in the License agreement screen as shown below. Now click “Next” button.


Enter the password for the Single sign on administrator in the screen shown below. the default user will be “admin@System-Domain”. The password must meet the complexity requirements of the system or the domain if a domain member. Now click “Next”


Now the turn for Database installation. You can either use the included SQL Express Edition or any other supported one. In the screen below SQL Express edition has been selected. Click on “Next” after selecting the desired one


Now user creation for database. Enter the desired passwords in the respective field. Remember the password must meet the complexity requirements of the system or the domain if a domain member. Click “Next” to proceed to the next screen.


The IP address or FQDN of the system. It is better to enter FQDN. After entering the value click “Next”.


If you enter IP address the following warning message will appear. Just click OK.


The installation location. Just click “Next” if you want the default value. Otherwise change it and click “Next”.


The HTTPS port number. Click “Next” to proceed further.


Click on “Install” to begin the installation procedure.


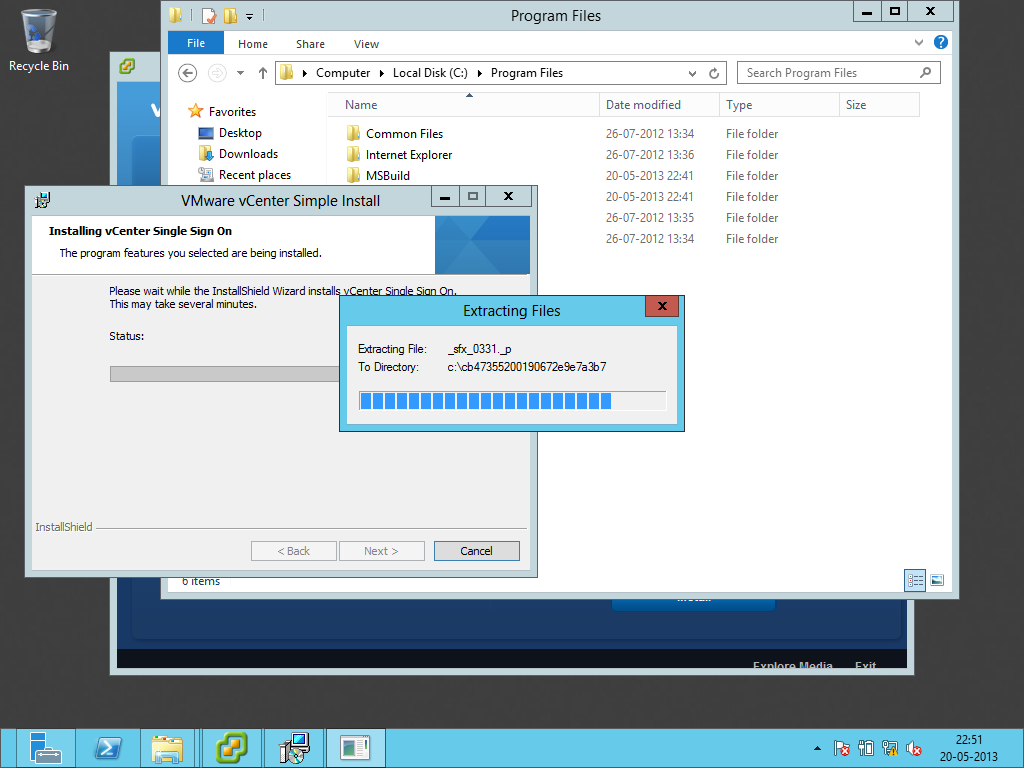
The installation screen is shown below. Wait for it to complete.


Extracting files for installation.


Installation of SQL Server database.


Finishing Installation. After this the installation of VMware vCenter Inventory Service will start.


Installation of VMware vCenter Inventory Service is starting.


vCenter server installation is starting.


Asking for License key of vCenter server. You can enter it here or later. Click “Next” to go to the next screen.


The database to be used for vCenter server. Specify the desired one and click on “Next”.


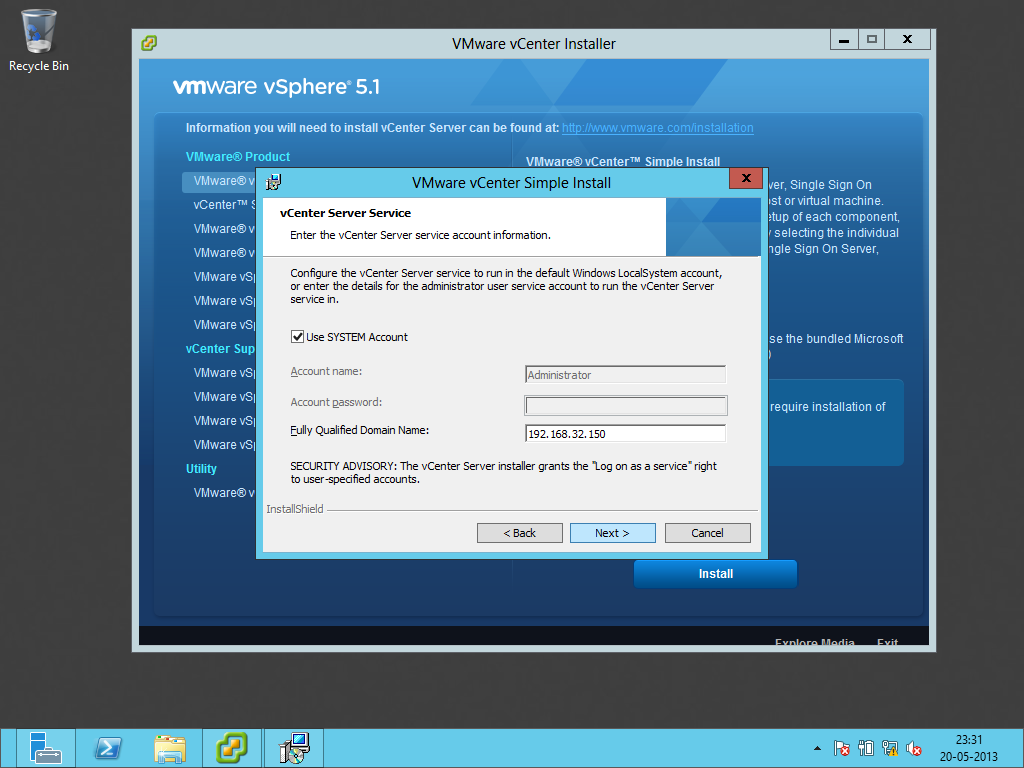
The user account under which the vCenter Server Service to run. Please enter the desired value and click “Next”.


A warning message on providing IP address in the previous screen. Just click “OK”.


The ports for vCenter Server. Click “Next” to continue.


The Inventory Size. Specify the desired one and click “Next”.


Click “Install” to begin installation.


Now all the installation has been completed. Click “Finish” to close the installation wizard.


We have completed the installation of vCenter Server on Windows Server 2012

Tuesday, 30 April 2013

Initial ESXi Configuration through direct console


To perform these initial configurations one has to access the ESXi server through direct console. (Unless, ofcourse DHCP is not set)


This is the ESXi console window. Press “F2” here to customize the ESXi server. On pressing “F2” a login window as shown below will appear.


The default “root” user is there. Enter the Password and press “Enter” key to login. On logging in the following window will appear, which helps you to change the desired setting for ESXi.


In the above window the first entry is for changing the “root” user password. The third one named “Configure Management Network” will help you set IP address, DNS, gateway, hostname etc for ESXi host. Use arrow key to select the entry and press “Enter” key to go into the configuration screen.


On pressing “Enter” key here you will be taken to the below screen.


This will show the network card selected for configuring Management Network. The MAC address of the card is also shown. Pressing the “Enter” key will display the screen as shown below.


If more than one network card is there, all will be displayed here. You can select the desired one from here. Pressing “Enter” key will save the changed while “Esc” will discard the changes.
Use the arrow keys on the parent window to select the “IP Configuration” entry as shown below


Now press “Enter” key to go to the configuration window as shown below


Here by default, the dynamic IP address setting is selected. Change it to static IP address to configure a static IP address. The enter the IP address , the mask and default gateway if any. Then press “Enter” key. This will take you to the parent window.
Now from the parent window select “IPV6 Configuration” and press “Enter” key. This will take you to the following window


Here by default IPV6 will be enabled. You can disable it here.
Now from the parent window select “DNS Configuration” and press “Enter” to configure the DNS and hostname entries. You will be taken to the following window


Set the DNS entries and hostname as you desire. Now press “Enter” key to save it.


After all these setting have been changed press “Esc” key from the above window to save the "Configuration. On pressing “Esc” key a dialog box as shown below will appear.


Press “Y” on this screen. If you have disabled IPv6, the host will reboot itself to save the changes.
Otherwise it will only restart the management network service. Then it will go the “System Customization” window.


If you want to ensure the network connectivity of ESXi server after these configurations, use the “Test Management Network” entry as shown in the above screen.


Here one will be address of the Gateway. The other entries by default will be DNS server address, if they are present. Else you can specify the address manually. Click “Enter” will begin the test and will show you the results.
After all the changes the console window will now look as follows.

Debian Deep Dive — Filesystem Hierarchy Standard

// System Administration · Debian Linux · Foundation The Linux Filesystem Hierarchy A thorough tour of the standard an...