Showing posts with label Windows 2012. Show all posts

Tuesday, 26 November 2013

Windows Registry location for Start-up Items


Login to Windows as administrator user. Now type “regedit” in the Run window. Press enter. This will bring the Registry Editor application.
Expand to the following key
HKEY_LOCAL_MACHINE\SOFTWARE\Microsoft\Windows\CurrentVersion\Run
As shown in the screen shot below the key will list the items that will start on logging to windows.You can delete the unwanted entries from the right pane [Please take a backup of registry before dealing with it]


Also you can check one more key
HKEY_CURRENT_USER\Software\Microsoft\Windows\CurrentVersion\Run
This key belongs to that of the current user. From this key also you can delete unwanted entries.
This key is for user specific startup setting while the first one is for machine specific startup setting. The entries under the first one will affect all the users of the system, while the entries under this key will affect only the current user. In our case this is the administrator user of the system

Tuesday, 21 May 2013

Installing vSphere Client in Windows Server 2012


From the vCenter Server CD go to the folder “vSphere-Client” and double click the “exe” file. The installation will start as shown below


The setup program will ask for the language. Click “OK” to start the installation wizard.


The installation programs is extracting the necessary files to start the installation wizard.


The first screen of the installation wizard. Click “Next” to go to the next screen of the installation wizard.


Click “Next” to proceed to the other screen.


Accept the license agreement and click “Next” to proceed further.


Specify the location for the client installation and click “Next”.


Click “Install” to start the installation process of vSphere Client.


Installation process started. Installing J# for vSphere Client.


Installation process continuing. Copying files.


Installation of vSphere Client completed.


vCenter Server Installation on Windows Server 2012


This procedure describes the installation of vCenter Server on Windows Server 2012. Insert the CD for vCenter server into the CD/DVD Drive. The “autorun” feature will bring the following screen to your computer desktop. In the below screen we have selected “VMware vCenter Simple Install”, because this helps us to install vCenter Single Sign On, vCenter Inventory Service and vCenter Server in a single click. Please note the prerequisites are met before starting the installation. We have to install .NET 3.5 SP1 manually, if it is not installed already by us manually.
As shown below select “VMware vCenter Simple Install” and click on “Install” button.


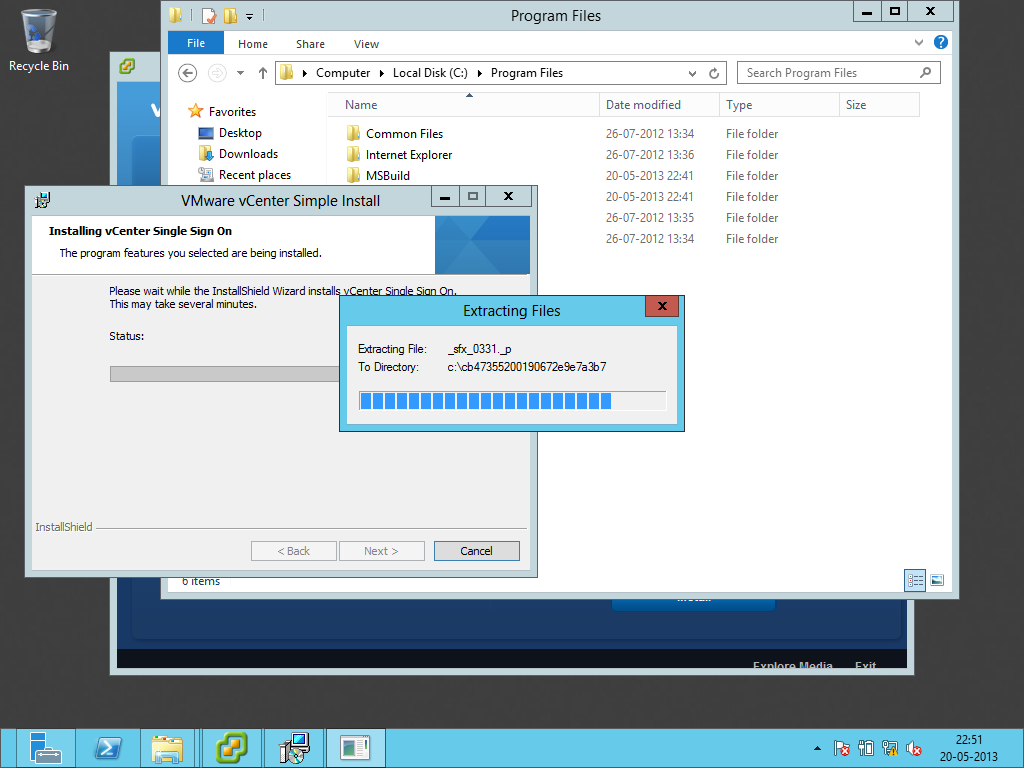
The installation of vCenter Single Sign On will start first. Since it is a prerequisite for vCenter Server installation. The screenshot is shown below


The first screen of installation wizard is shown below. Wait for the “Next” button to get enabled.


A warning showing that the machine is not a member of domain. Just click “OK”.


Now the wizard starts extracting files required for installation as shown below.


As shown below, now the “Next” button is enabled. Click on it to go to the next screen.


Click  the “Next” button again for the screen shown below


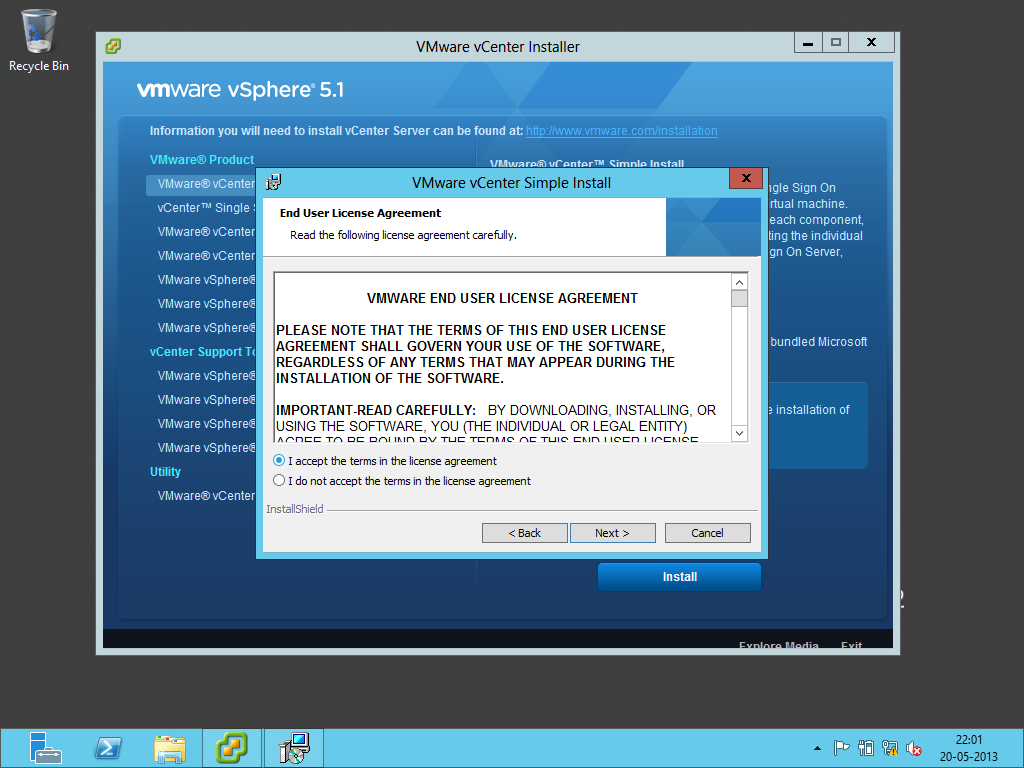
Select the “I accept…” option in the License agreement screen as shown below. Now click “Next” button.


Enter the password for the Single sign on administrator in the screen shown below. the default user will be “admin@System-Domain”. The password must meet the complexity requirements of the system or the domain if a domain member. Now click “Next”


Now the turn for Database installation. You can either use the included SQL Express Edition or any other supported one. In the screen below SQL Express edition has been selected. Click on “Next” after selecting the desired one


Now user creation for database. Enter the desired passwords in the respective field. Remember the password must meet the complexity requirements of the system or the domain if a domain member. Click “Next” to proceed to the next screen.


The IP address or FQDN of the system. It is better to enter FQDN. After entering the value click “Next”.


If you enter IP address the following warning message will appear. Just click OK.


The installation location. Just click “Next” if you want the default value. Otherwise change it and click “Next”.


The HTTPS port number. Click “Next” to proceed further.


Click on “Install” to begin the installation procedure.


The installation screen is shown below. Wait for it to complete.


Extracting files for installation.


Installation of SQL Server database.


Finishing Installation. After this the installation of VMware vCenter Inventory Service will start.


Installation of VMware vCenter Inventory Service is starting.


vCenter server installation is starting.


Asking for License key of vCenter server. You can enter it here or later. Click “Next” to go to the next screen.


The database to be used for vCenter server. Specify the desired one and click on “Next”.


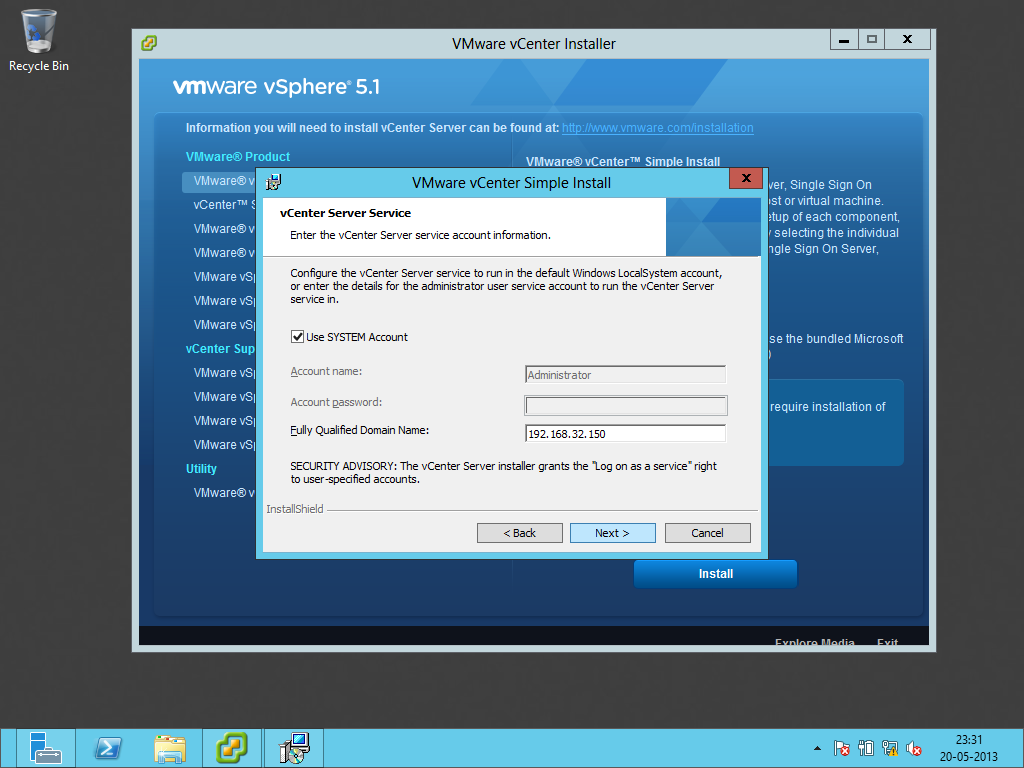
The user account under which the vCenter Server Service to run. Please enter the desired value and click “Next”.


A warning message on providing IP address in the previous screen. Just click “OK”.


The ports for vCenter Server. Click “Next” to continue.


The Inventory Size. Specify the desired one and click “Next”.


Click “Install” to begin installation.


Now all the installation has been completed. Click “Finish” to close the installation wizard.


We have completed the installation of vCenter Server on Windows Server 2012

Tuesday, 30 April 2013

Some PowerShell Commands


Restarting Computer

Use the following command to restart the local computer

Restart-Computer

Shutdown Computer

Use the following command to restart the local computer

Stop-Computer

Renaming Computer

Use the following command to restart the local computer

Rename-Computer -NewName <name_in_string>

You need to restart the computer after renaming. If you want powershell to do it use the “-Restart” option as shown below

Rename-Computer -NewName <name_in_string> -Restart

Saturday, 23 March 2013

Windows Server 2012 Server Core–Playing with Network Card using PowerShell Part 2
Setting DNS server First find the InterfaceAlias or InterfaceIndex using the “Get-NetIPInterface” of the desired interface. Now use the following command to set the DNS server IP address
Set-DNSClientServerAddress –InterfaceIndex <InterfaceIndex as UInt32> -ServerAddresses <Comma separated list of IP Address as String>
                                                                 or
Set-DNSClientServerAddress -InterfaceAlias <InterfaceAlias as String> -ServerAddresses <Comma separated list of IP Address as String>
Before Setting DNS
  After Setting DNS
Removing DNS server First find the InterfaceAlias or InterfaceIndex using the “Get-NetIPInterface” of the desired interface. Now use the following command to reset the DNS server IP address
Set-DnsClientServerAddress –InterfaceIndex <InterfaceIndex as UInt32> -ResetServerAddresses
                                       or
Set-DnsClientServerAddress -InterfaceAlias <InterfaceAlias as String> –ResetServerAddresses
After resetting DNS
Removing IP Address First find the InterfaceAlias or InterfaceIndex using the “Get-NetIPInterface” of the desired interface. Now use the following command to remove just the IP address from the interface
Remove-NetIPAddress –InterfaceIndex <InterfaceIndex as UInt32>
                                 or
Remove-NetIPAddress -InterfaceAlias <InterfaceAlias as String>
 If you want to remove the IPAddress without confirmation just use the option “-Confirm:$false” at the end of above command, of course without quotes. Now if you want to remove IPAddress and default gateway then use the following command. Use “-Confirm:$false” part only if you don't want questions for confirmation.
Remove-NetIPAddress –InterfaceIndex <InterfaceIndex as UInt32> -IPAddress <IPAddress as String> -DefaultGateway <DefaultGateway as String> [-Confirm:$false]
                                                                       or
Remove-NetIPAddress -InterfaceAlias <InterfaceAlias as String> -IPAddress <IPAddress as String> -DefaultGateway <DefaultGateway as String> [-Confirm:$false]
 Viewing DNS cache Use the following command to view the DNS cache
Get-DNSClientCache
 Clearing DNS Cache Use the following command to clear the DNS Cache
Clear-DNSClientCache


Debian Deep Dive — Filesystem Hierarchy Standard

// System Administration · Debian Linux · Foundation The Linux Filesystem Hierarchy A thorough tour of the standard an...