Showing posts with label Unity Desktop. Show all posts

Tuesday, 14 January 2014

Editing Software Sources in Ubuntu through GUI


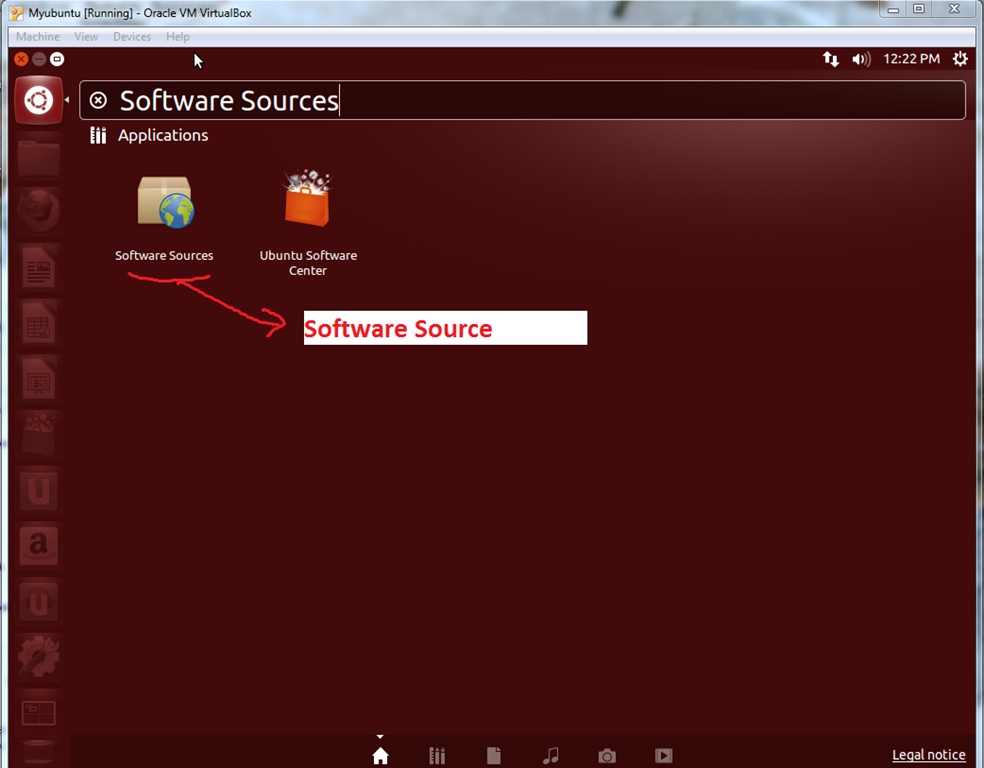
For this first we will go to the Dash Home and type the word “Software Sources” in the search box as shown below. This will list the software. Just click on it.
As shown below this will bring a Dialog Window. It has got several tabs. They are “Ubuntu Software”, “Other Software”, “Updates”, “Authentication” and “Additional Drivers” in that order. Let us check the first tab “Ubuntu Software”. Here you have the options to determine what all needed to be downloaded by ticking the options. Also you can select which server you need to use to download.

For changing the server, you need to be provide the password. You need to be a sudo user.

The next tab is “Other Software”. Here you can add the extra repositories you want to download from.

Now comes the “Updates” tab. Here you can choose what type of updates you want to install. Also the frequency of checking for updates can be set. You can also set how to notify you about updates.

Authentication tab helps you add or remove repository key files. Key files are needed for checking the authenticity of repositories.

The last tab is “Additional Drivers”. It will show if any of your hardwire has hot some additional drivers.

After doing the changes as desired, just click the “Close” button. If you want to change any settings you can click on the “Revert” button.

Wednesday, 20 November 2013

Removing Guest Account from Login screen in Ubuntu


Ubuntu 13.04
As shown below by default the Guest account will be enabled in Ubuntu.

To remove this Guest Account from the login screen, first login to Ubuntu as administrator. Then open the terminal and type the command:
sudo gedit /etc/lightdm/lightdm.conf

This will open the “lightdm.conf” configuration file in gedit application. Now add the following line to the end of the file as shown below:
           allow-guest=false

Now save the file by pressing “Ctrl+S” and close the gedit application. In the terminal type the following command to restart the lightdm service
sudo restart lightdm

This will take you to the login screen. Now there will be no guest account entry on the login screen as shown below


Ubuntu 13.10
Here the file you need to edit is a different one. In the terminal type the following command
sudo gedit /etc/lightdm/lightdm.conf.d/50-unity-greeter.conf
This will open the “50-unity-greeter.conf” configuration file in gedit application. Now add the following line to the end of the file as shown below:
           allow-guest=false
For the rest proceed as mentioned for 13.04

Wednesday, 4 September 2013

Ubuntu 13.04 desktop


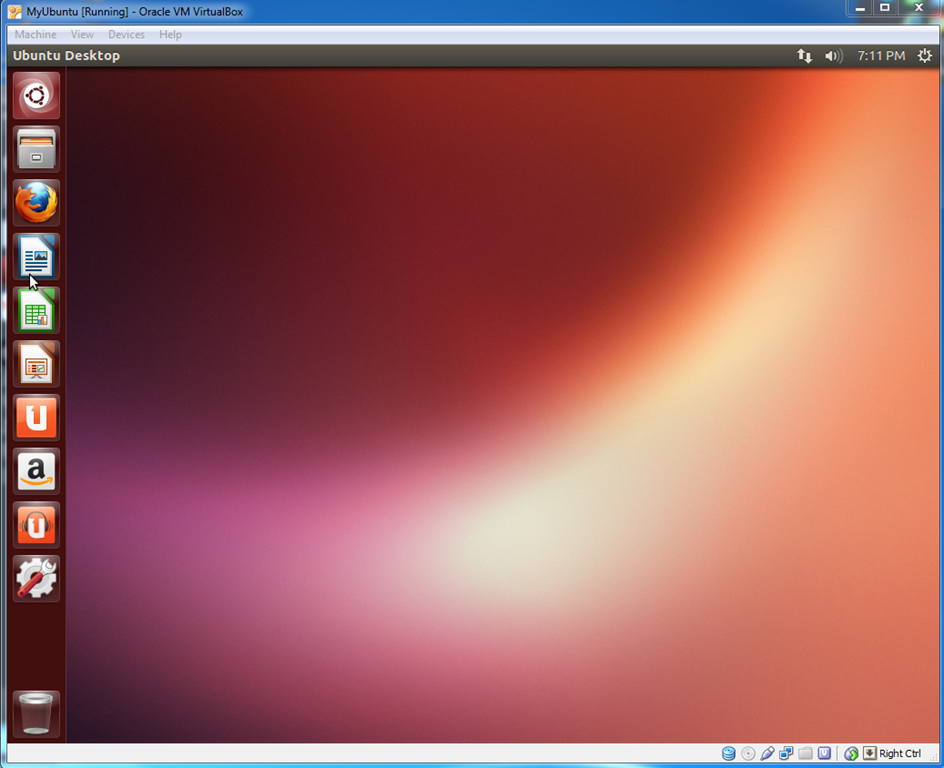
Lets us go through ubuntu desktop. In the picture below the elements on the desktop has been marked.


So there is a Dash (something similar to Start Orb in Windows), there is a menubar (which will serve as the menubar for all applications), a Launcher (something similar to taskbar icons in Windows) and a system menu in the menubar. Whatever application you take, the icons of network and sound and the time and system menu will always be there in the menubar.
Let us see what the Dash holds. See the picture below.


To open the Dash you have to click the Ubuntu Dash icon in the Launcher. This will be the first icon in the Launcher. Clicking on the icon will bring a search window where you can type the desired name. The bottom part of the window has got a number of icons, which are called lenses, which help you to focus the search to a particular type.
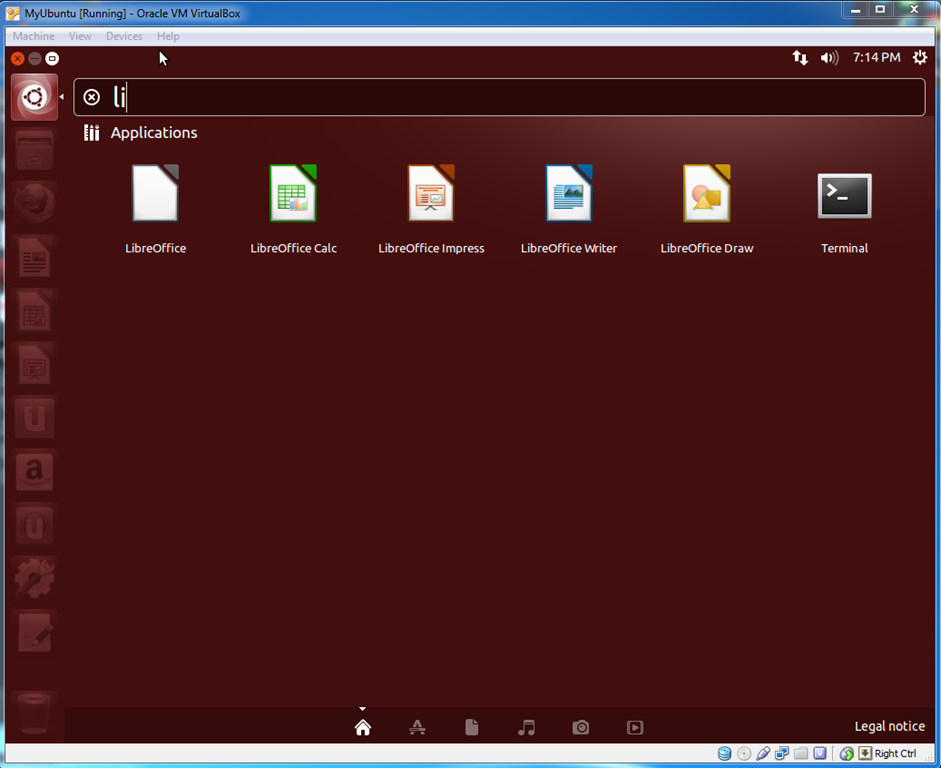
See the picture below to see what happens as soon as you start typing in the search box in the Dash home.


Yes it started showing the result.


Now see the different lenses in the Dash window. The different once are Dash Home, Application Lens, File Lens, Music Lens, Photo Lens and Video Lens.
Now let us take a look at the launcher. Right click any icon in the Launcher. It will bring a small menu which will help you to work with the icon


To remove an icon from the launcher, as shown in the above picture, just right click the icon and click on the menu item “Unlock from Launcher”. As shown the picture below, the item will be removed from the launcher.


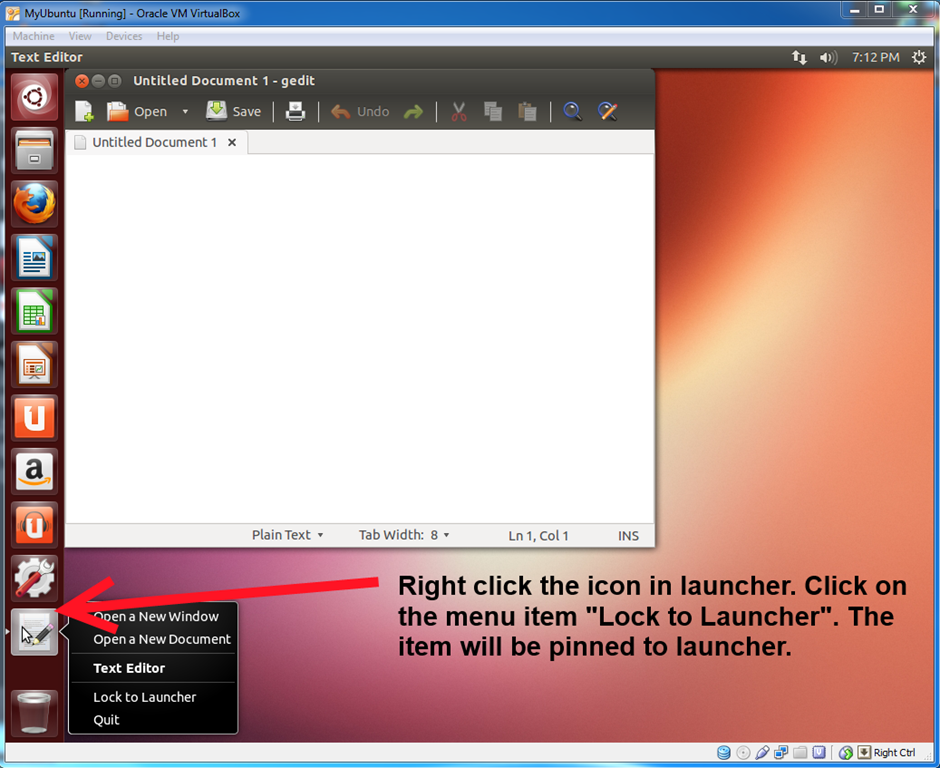
As soon as you launch any application it’s icon will be displayed in the launcher. So if you want to lock some running application to the launcher, please do as shown below.


Just right click on the icon in the launcher and click on the menu item “Lock to Launcher”. The item will be locked to the launcher as shown below.


Now let us see what is in the System menu in the menubar.


As you can see in the picture, it will help the user to “Log Out”, “Shutdown”, “Lock” and switch between user. Not only that it helps to access the “System Settings”. It also helps to know about your computer and also to access the help files for ubuntu.
Hope this helps in familiarizing the ubuntu desktop. This is just a brief. We will go deeply later.

Debian Deep Dive — Filesystem Hierarchy Standard

// System Administration · Debian Linux · Foundation The Linux Filesystem Hierarchy A thorough tour of the standard an...