Monday, 2 December 2013

Installing Ubuntu Server 13.10 in Virtualbox


As usual let us create a VM in virtual box as shown below


Click on the “New” button after invoking Virtualbox as shown above.

The the name of your VM. If your name contains the word “Ubuntu” anywhere, virtualbox will automatically select the version as “Ubuntu”. Otherwise do the same. Select type as “Linux” and version as “Ubuntu (64-bit)”.

Select the memory size. the minimum is “512 MB”.

Now select the option “Create a virtual hard drive now” and click on “Create”.

In the next page, select “VDI” as the type of hard drive file and click on “Next”.

No specify what type the hard drive to be. Select the desired one and click “Next”. Here, we have selected “Dynamically allocated”.


Select the location where the hard drive should be saved and also select the size of the hard drive. The minimum size is “8 GB”. Now click on “Create”. The different screen views are shown above.

In the above screenshot the initial size of the virtual hard drive file is shown if the type is “dynamically allocated”

Now let us change some setting of the VM. For this right click the VM and click on the menu item “Settings”.

In the “Setting” window select “Storage”. Click on the “CD icon” to the right of “CD/DVD Drive” box. Click “Choose a virtual CD/DVD disk file….”.

Browse to the server iso file and select it. Now click the “Open” button.

Now click the “OK” button in the “Settings” window. Now power on the VM by clicking the “Start” icon.

When the Ubuntu server boots from the CD, it first shows a language selection window. Select the desired language.

Now it will list out the options for you to select. Select the option “Install Ubuntu Server” and press Enter key.

Select the language for the ubuntu server that you are going to install and press Enter key.

Select the country and press Enter key

Now it will ask whether to detect the keyboard layout or not. Select the desired answer. Here we have selected “No”. Press Enter key to proceed

Select the country or origin of the keyboard layout from the list and press Enter key.

Select the keyboard layout from the list and press Enter key as shown above.


Ubuntu is preparing for the configuration of network.

Now it is trying to auto configure IPv6.

Since it is unable to autoconfigure IPv6, it is trying DHCP.

Showing the auto configure failure dialog box. Press Enter key to continue

Now it is showing different options for configuring network. Here we select “Configure network manually”. Select the desired option and press Enter key.

Enter the desired IP address. Select the “Continue” option (Press Tab key to select it) and press Enter key.

Enter the Netmask and press Enter key after selecting “Continue”.

Enter the gateway address and press Enter key after selecting “Continue”

Enter the desired DNS address and select “Continue” and press Enter key.

This shows the Ubuntu configuring network link with the entered values.

Enter the “Hostname” and press enter after selecting “Continue”.

No it will ask for the Full name of the use. Please enter the same and press enter after selecting “Continue”

Now enter the username and press enter after selecting “Continue”.

Now enter the password and press enter after selecting “Continue”.

In this screen as shown above re-enter the password for verification and press enter after selecting “Continue”.

Now Ubuntu will query to encrypt the home directory or not. Select the desired option and press enter to continue.

After this ubuntu will try to setup the clock correctly as shown above.

It will ask you to verify the time zone correctly. Select the desired option and press enter to continue.
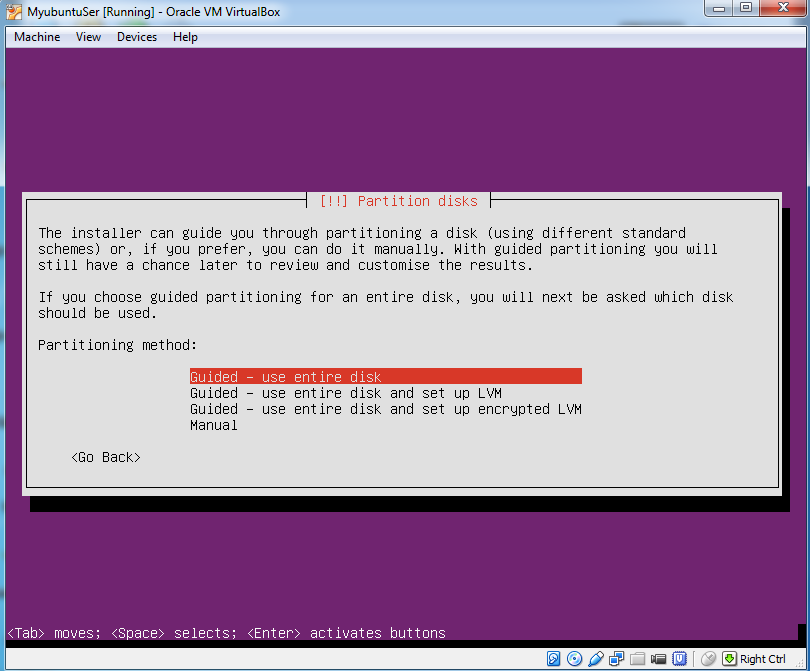
Now Ubuntu will ask you to partition the disk as you wish.
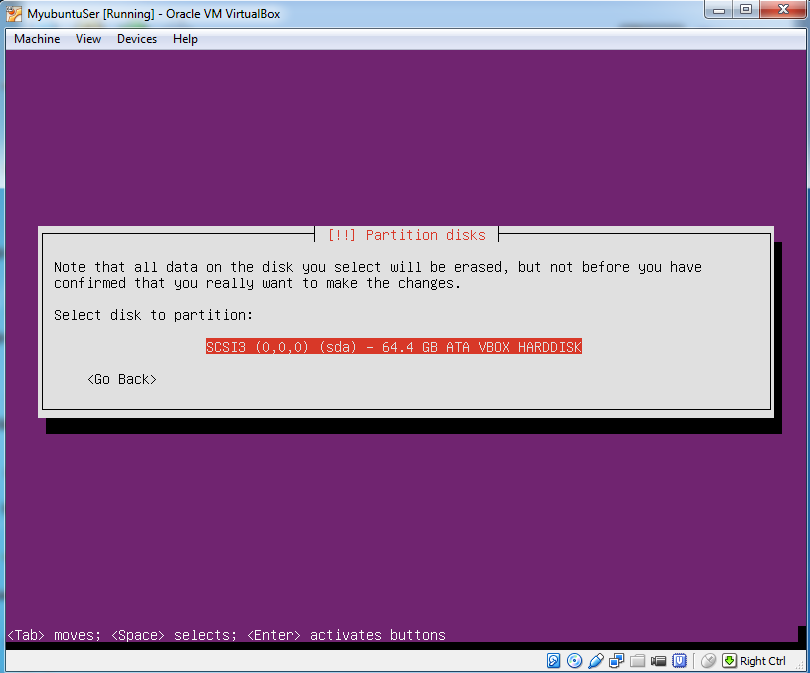
Since we have selected to use the entire disk, It will ask us to select the disk we want to use. Select the disk and press enter.

Ubuntu is showing how the partitions will be created. It is also asking for the permission to write the changed to the disk. Select “Yes” and press Enter key

It is installing the system

Ubuntu is asking for proxy details, if your system is behind any proxy. If none is there leave the field blank

It is now configuring apt

It is now asking how you want the updates to be managed

Now it queries how you want to setup your initial system. Here we have selected to setup it as “Samba file server”. If you don’t want to setup anything initially, select “Manual package selection”.

Asking permission to install GRUB.
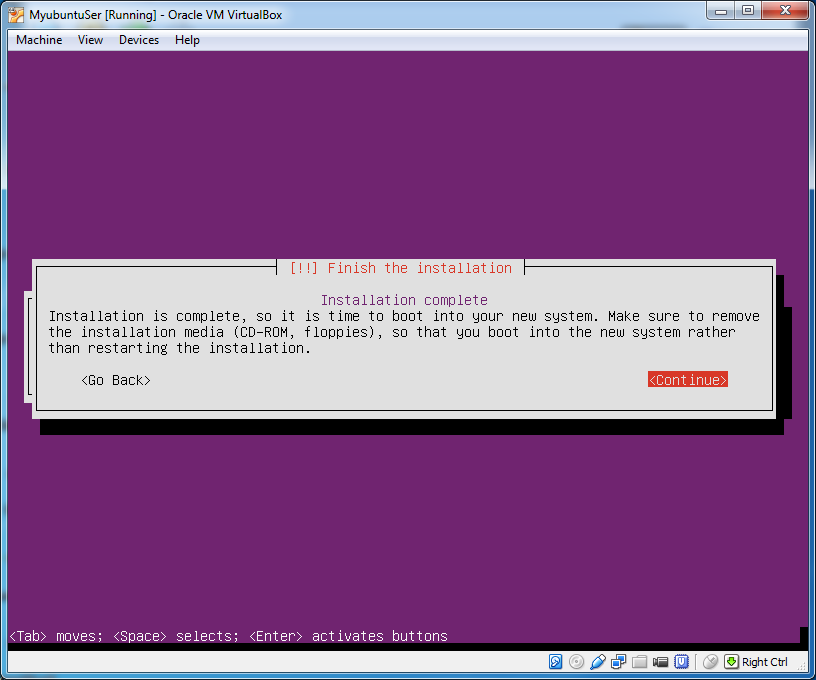
The Server Installation has completed.

The new Ubuntu server login screen.

Tuesday, 26 November 2013

Windows Registry location for Start-up Items


Login to Windows as administrator user. Now type “regedit” in the Run window. Press enter. This will bring the Registry Editor application.
Expand to the following key
HKEY_LOCAL_MACHINE\SOFTWARE\Microsoft\Windows\CurrentVersion\Run
As shown in the screen shot below the key will list the items that will start on logging to windows.You can delete the unwanted entries from the right pane [Please take a backup of registry before dealing with it]


Also you can check one more key
HKEY_CURRENT_USER\Software\Microsoft\Windows\CurrentVersion\Run
This key belongs to that of the current user. From this key also you can delete unwanted entries.
This key is for user specific startup setting while the first one is for machine specific startup setting. The entries under the first one will affect all the users of the system, while the entries under this key will affect only the current user. In our case this is the administrator user of the system

Windows PowerShell 4.0


The download link to Windows PowerShell 4.0

http://www.microsoft.com/en-us/download/details.aspx?id=40855

Supported Systems

  • Windows 7 SP1
  • Windows 2008 R2 SP1
  • Windows Server 2012
  • Windows Server 2012 R2
  • Windows 8.1

What are the new features in PowerShell 4.0 can be found in the following Microsoft TechNet Library Link

http://technet.microsoft.com/en-us/library/hh857339.aspx

Monday, 25 November 2013

Finding Disk Space using command line in Ubuntu


Let see how we can use the “df” command to find the disk space and partitions in Ubuntu
First open a terminal. Now type the command “df –h”. This will show an output as shown in the picture below. Here the option “-h” is used to produce the output in human readable form

 
As you can see the output will have 6 columns. First one is the “Filesystem”, second showing the total size, third the used space, fourth the remaining space, fifth the space usage in percentage and the last column shows where it is mounted.
Now if we want to get the total also just add one more option to the command. The option is “- -total”. Now the command become “df –h - -total”. As shown below it will show the total disk space, total usage, total free and the total usage percentage.

Wednesday, 20 November 2013

Removing Guest Account from Login screen in Ubuntu


Ubuntu 13.04
As shown below by default the Guest account will be enabled in Ubuntu.

To remove this Guest Account from the login screen, first login to Ubuntu as administrator. Then open the terminal and type the command:
sudo gedit /etc/lightdm/lightdm.conf

This will open the “lightdm.conf” configuration file in gedit application. Now add the following line to the end of the file as shown below:
           allow-guest=false

Now save the file by pressing “Ctrl+S” and close the gedit application. In the terminal type the following command to restart the lightdm service
sudo restart lightdm

This will take you to the login screen. Now there will be no guest account entry on the login screen as shown below


Ubuntu 13.10
Here the file you need to edit is a different one. In the terminal type the following command
sudo gedit /etc/lightdm/lightdm.conf.d/50-unity-greeter.conf
This will open the “50-unity-greeter.conf” configuration file in gedit application. Now add the following line to the end of the file as shown below:
           allow-guest=false
For the rest proceed as mentioned for 13.04

Tuesday, 12 November 2013

Some Firefox Shortcuts


Opening New Tab Ctrl + T
Opening New Window Ctrl + N
Making the Menu bar Visible Alt
Closing a Tab Ctrl + W or Ctrl + F4
To navigate through tabs forward Ctrl + Tab
To navigate through tabs backward Ctrl + Shift + Tab
Closing a Window Ctrl + Shift + W
Moving Forward Alt + Right Arrow
Moving Backward Alt + Left Arrow
Going to Home Alt + Home
To see the Download Window Ctrl + J
To Open Firebug (if installed) F12
To Display the Addons Window Ctrl + Shift + A
To Bookmark Current Page Ctrl + D
Viewing or Closing Bookmarks Sidebar Ctrl + B
Viewing or Closing History Sidebar Ctrl+H
Reload a page Ctrl + R
Reload a page ignoring content in the cache Shift + Ctrl + R
To stop the loading of a page Esc
Opening a link in new tab Ctrl + Left mouse button
Adding .com to the end of the address in the address bar Ctrl + Enter
Adding .org to the end of the address in the address bar Shift + Ctrl +Enter
Adding .net to the end of the address in the address bar Shift + Enter

Debian Deep Dive — Filesystem Hierarchy Standard

// System Administration · Debian Linux · Foundation The Linux Filesystem Hierarchy A thorough tour of the standard an...