Let us see how to create a VM in virtualbox for installing Ubuntu

First click on the “New” icon in the VirtualBox Manager. This will bring the “Create Virtual Machine” wizard. Now type the name of the VM in the “Name” field. If the name contains a word “Ubuntu” it will automatically select the “Type” as “Linux” and “Version” as “Ubuntu”. Otherwise select the same for both the fields. After that click on the “Next” button.

This will take you to the next page to specify “Memory Size”. The default will be 512MB. Here I have selected 1024 MB (1 GB). Please select the desired memory size (Don’t select the full memory as your system needs memory to run) and click next.

This will take you to the Virtual Hard Disk creation page. If you don’t want to add a Virtual Hard disk now, please select the option “Do not add a virtual machine”. If you have already created a Virtual Hard disk and wanted to add that, please select the option “Use an existing virtual hard drive file”. If you want to create a virtual hard disk now please select the option “Create a virtual hard drive now” (Which I have selected here) and click on next.

This will take you to the “Create Virtual Hard Drive” wizard. In the first page select the type of the virtual hard drive. The “VMDK” type is the one used by Vmware. Here I have selected “VDI” as the type of the file. Now click on the “Next” button.
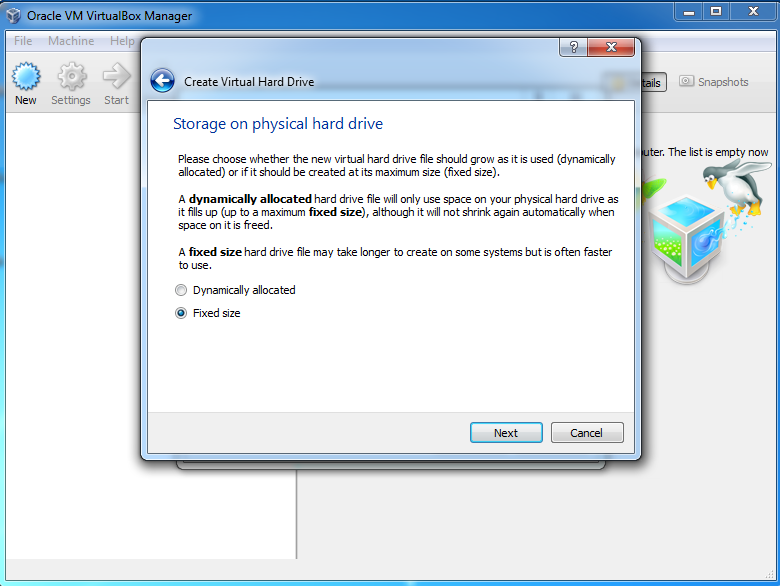
In the next page of the wizard select the form of allocation in virtual hard disk. You can have a “Dynamically allocated” disk or a “Fixed size” disk. For the “Dynamically allocated” disk you will specify the total size of the disk at the start, but the disk will be created only with the minimum size just required to create the disk. It will grow dynamically (up to the size you specified) as more contents will be loaded to the disk. This type of disk will be created very quickly. But for “Fixed size” disk the disk will be created with total size. This type of disk will take to create some time. Here we have selected “Fixed Size”. Now click on “Next” button

In this page browse the location where this virtual hard disk should be saved. Also specify the size of the disk. After that click on “Create” button.

In this screen as you can see the disk creation has started..

In this screen the VM has been created. Now it is ready for installation of the OS. That will be explained in the next Post.

No comments:
Post a Comment