Let us install the Ubuntu 13.04 OS inside the already created VM. For this first we need to edit the setting of the VM.

As you can see in the picture, right click the VM and click on the “Settings” menu item. This will bring the following dialog box.

In the dialog box, select “Storage”. In the “Storage” page click on the CD symbol. Here it is show with the label “Empty” since no CD/DVD is assigned.
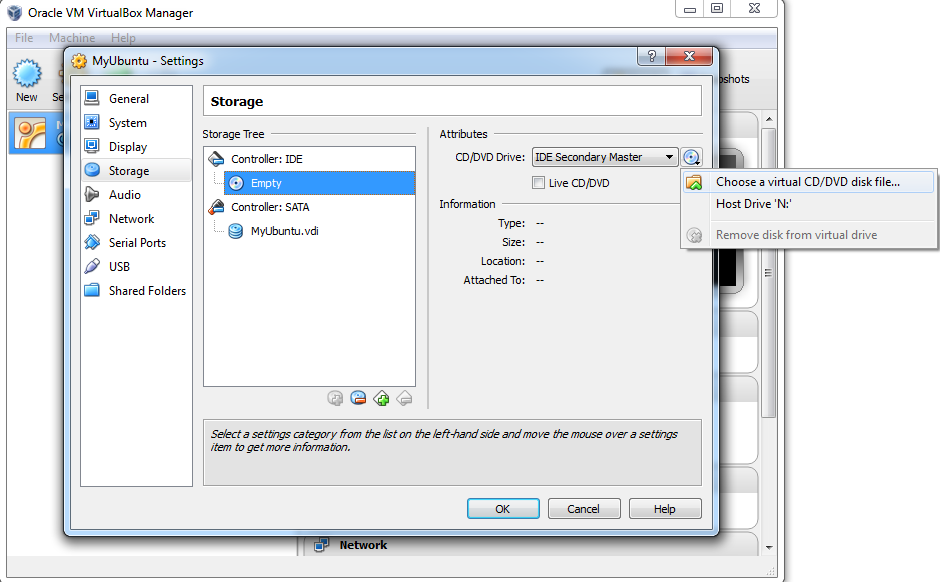
After selecting the CD/DVD icon click on the rightmost CD icon as shown. This will bring a menu and click on the item “Choose a virtual CD/DVD disk file”. After selecting the desired iso file the screen will be as follows.

As we have assigned the ubuntu iso file as virtual CD drive, now click on “OK” button. Now click on the “Start” button as shown in the image below

This will start the VM as shown below

Now the VM starts booting from the CD

After the initial loading is complete it will show the setup wizard as shown below

Since we are going to install Ubuntu here, from the above picture click on the “Install Ubuntu” button. Of course, select the language as desired by you. This will take you to the next screen as shown below

Select the checkbox “Download updates while installing”, if you want to download the updates and also you have a live internet connection. Similarly, select the checkbox “Install this third-party software” if you want to do so.. Here we will keep it as default and will click on ”Continue” button.

This screen will ask you about the installation type you want. We will select the first one that is “Erase disk and install Ubuntu”. Now click on the “Install Now” button.

This screen will ask you to select the desired time zone. Click on the correct location in the map and it will show the place name. Here we will select “Kolkata”, since am from India. Now click on “Continue” button.

Here select the desired Keyboard layout. Here “English(US)” is selected. There is also provision to detect your keyboard layout. For this click on the button “Detect Keyboard Layout”. Now click on the “Continue” button.

Now this is the final dialog box asking information. Here you have to enter your name, the computer’s name, a username, and a password. Also you can select “log in automatically” and “Encrypt my home folder”. After entering/selecting desired values click on the “Continue” button.

The installation has started here.

Now the installation has finished. Click on the “Restart Now” button to restart the system. Just note that the system will eject the CD/DVD Drive before restarting. You have to press enter to continue the restarting process when the CD/DVD drive is ejected

The system has restarted. The login screen for the user. Once you login you can see the screen below, the Ubuntu desktop.

Wow!!!!!!!!!! Our Ubuntu.
No comments:
Post a Comment